Seatbelts
Seatbelts
The seatbelts in the AU Falcons are largely easy to replace but require a single tool that may not be found in a standard toolbox, a T50 Torx socket. a 3/8” drive socket and ratchet is recommended as the bolts can be easily accessed without the ratchet fouling on the seat or without having a lack of leverage from a short handled 1/4” ratchet.
Replacement
-
Remove the single T50 bolt holding the end of the seatbelt to the floor
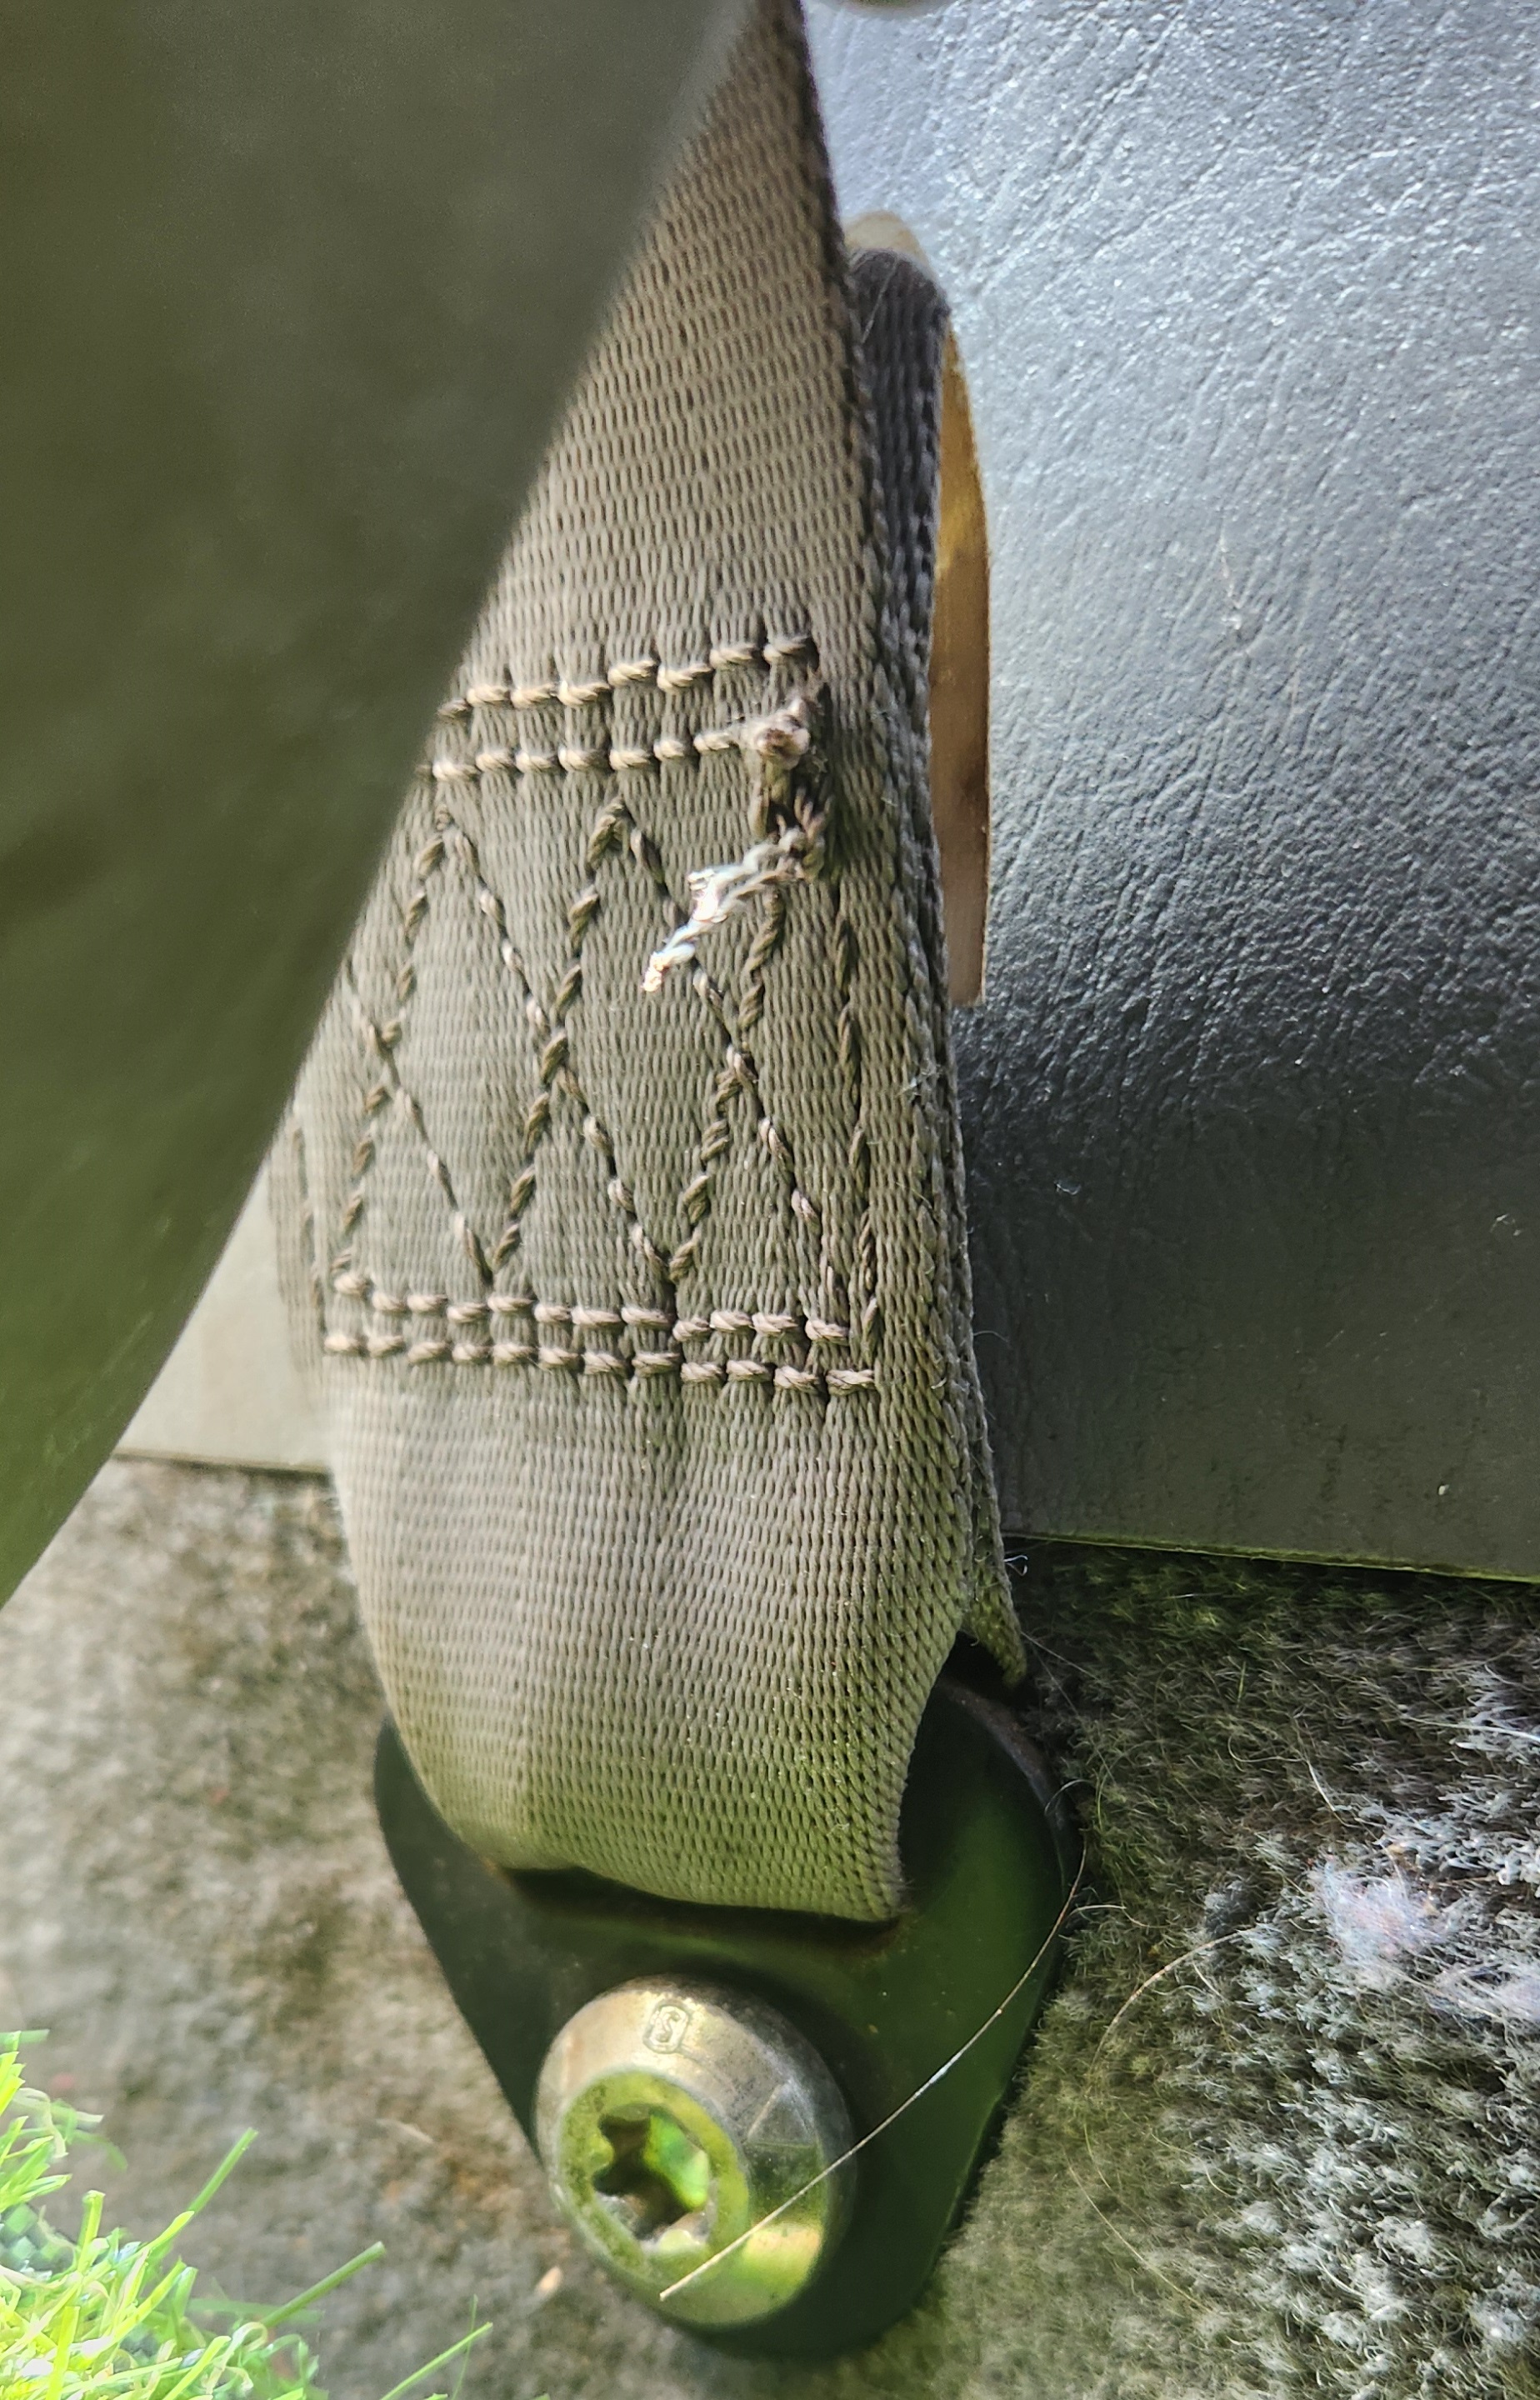
The first T50 bolt. Note that there may be a small round plastic cover over this bolt, however this particular vehicle did not have it
- While holding the end of the seatbelt away from where the bolt was, thread the seatbelt through the upper B-Pillar trim plastic. Try to keep as much tension on the seatbelt as possible while doing this, as it makes the process easier
-
(optional) tie the end of the seatbelt to a section of the seatbelt between the upper anchor and the lower B-Pillar plastic trim. This will prevent the seatbelt from retracting too far and too fast upon removal, potentially saving the mechanism if you wish the reuse it
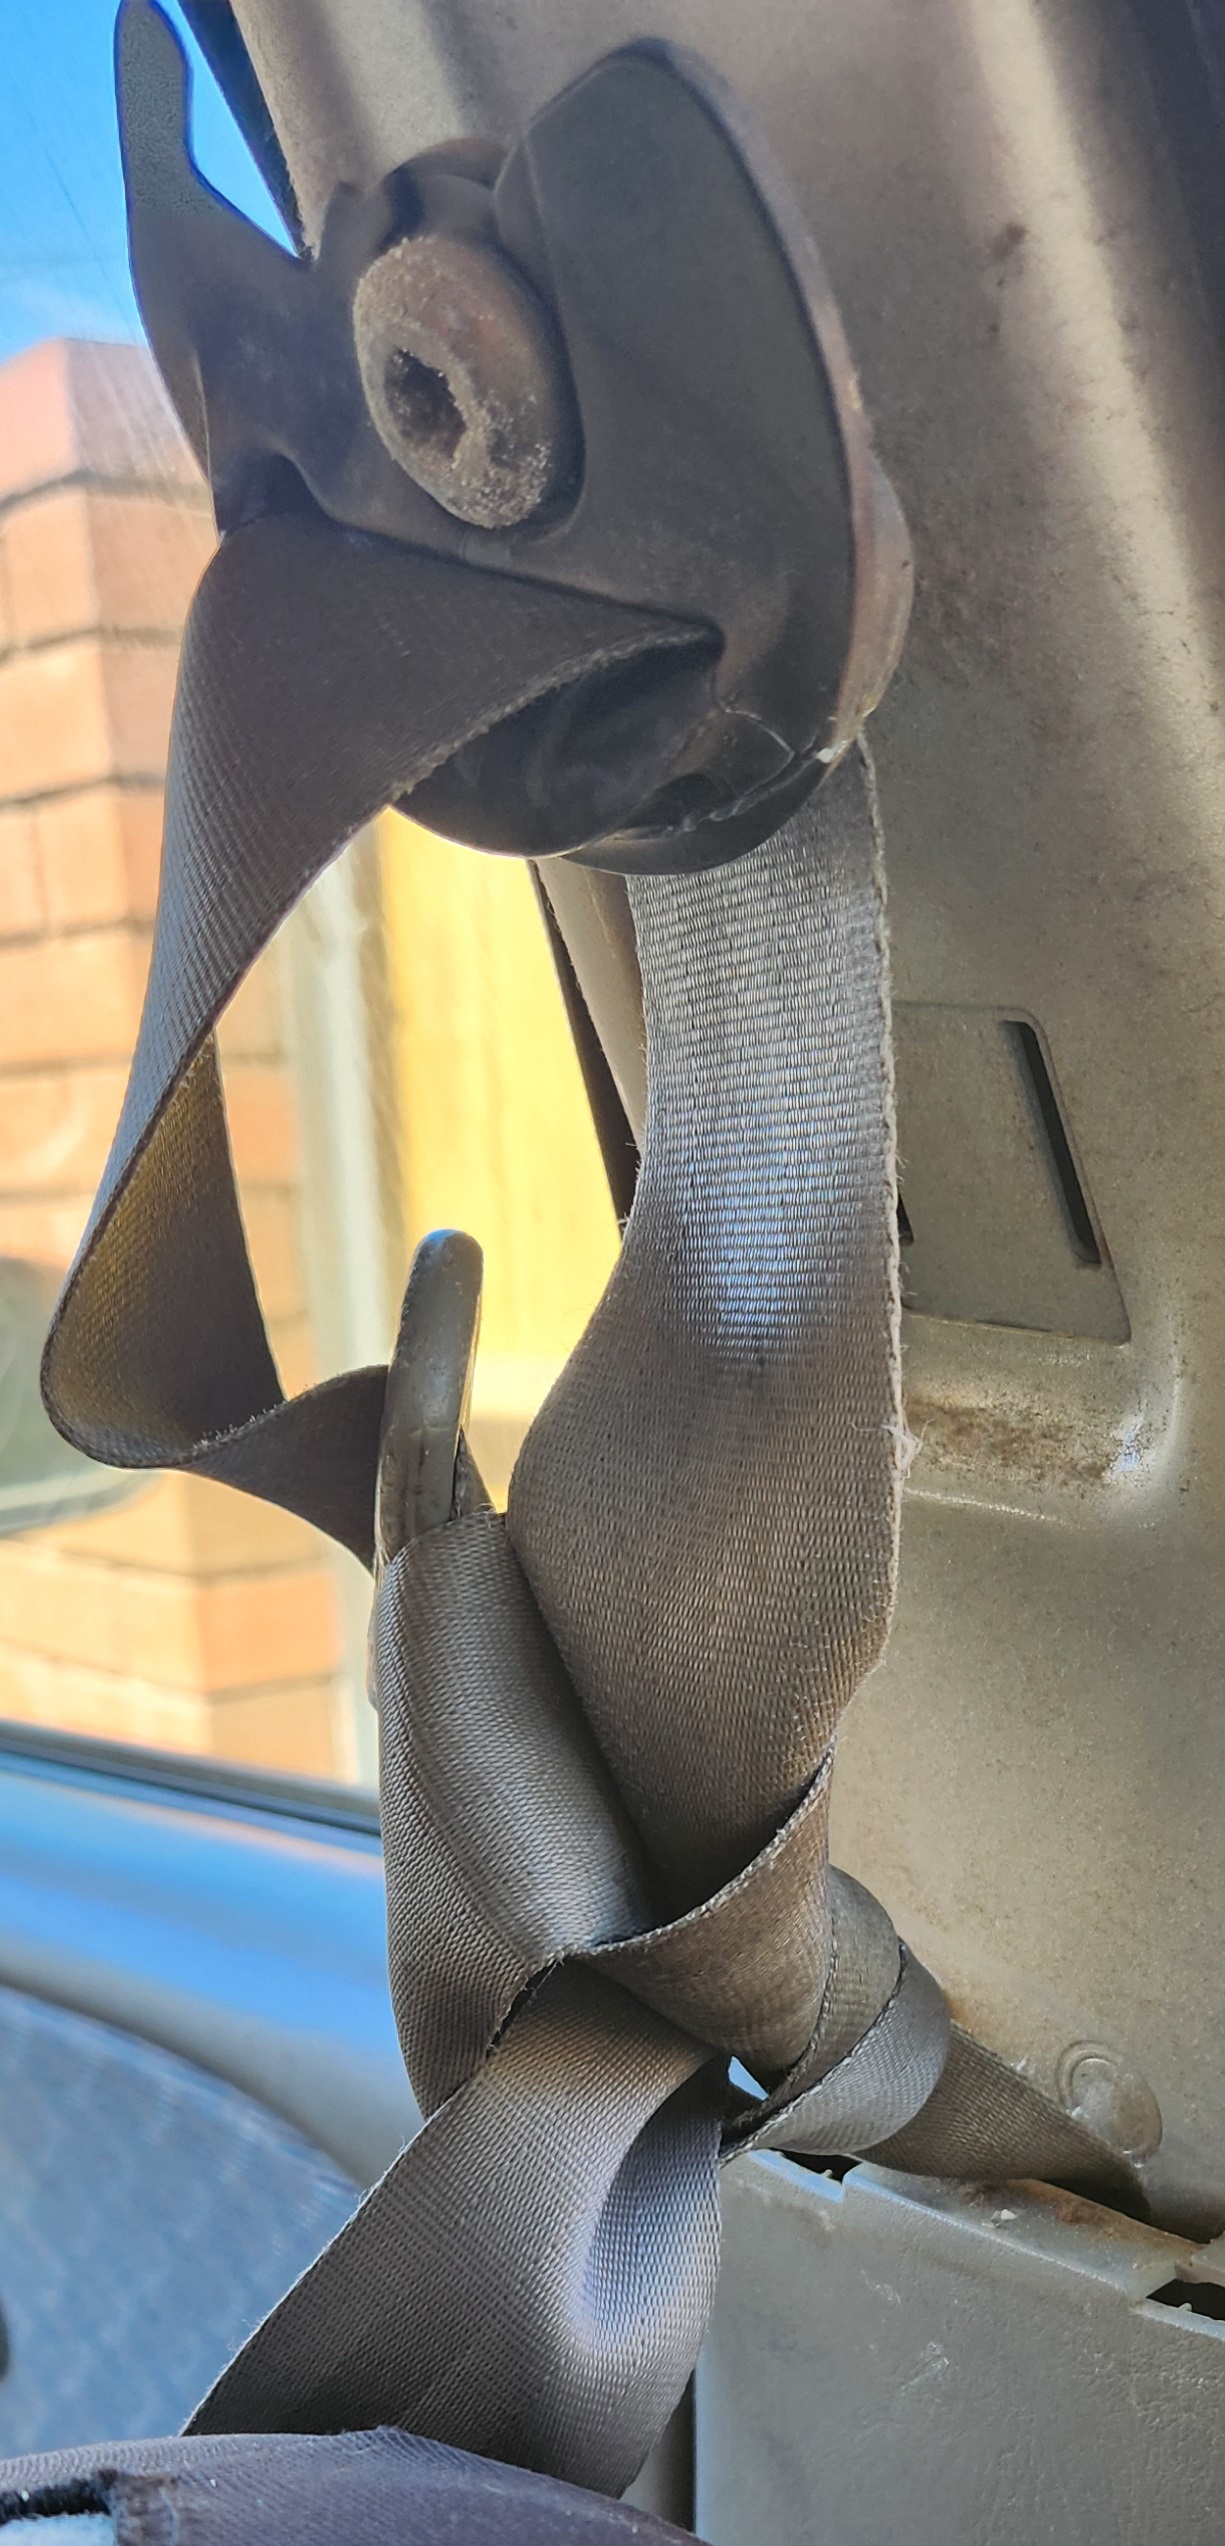
The type of knot to put into the seatbelt. This is simply to stop the seatbelt itself from retracting far enough and fast enough to break the retraction mechanism later
-
Unscrew the 2 upper screws on the lower B-Pillar trim piece using a phillips head screwdriver, and gently pull the plastic from the chassis, noting that it is help in with 2 large metal clips towards the bottom. The lower trim can them be removed by unclipping the 2 metal clips towards the bottom of the plastic, and then sliding the assembly up until the lower plastic tabs come free of the steel body
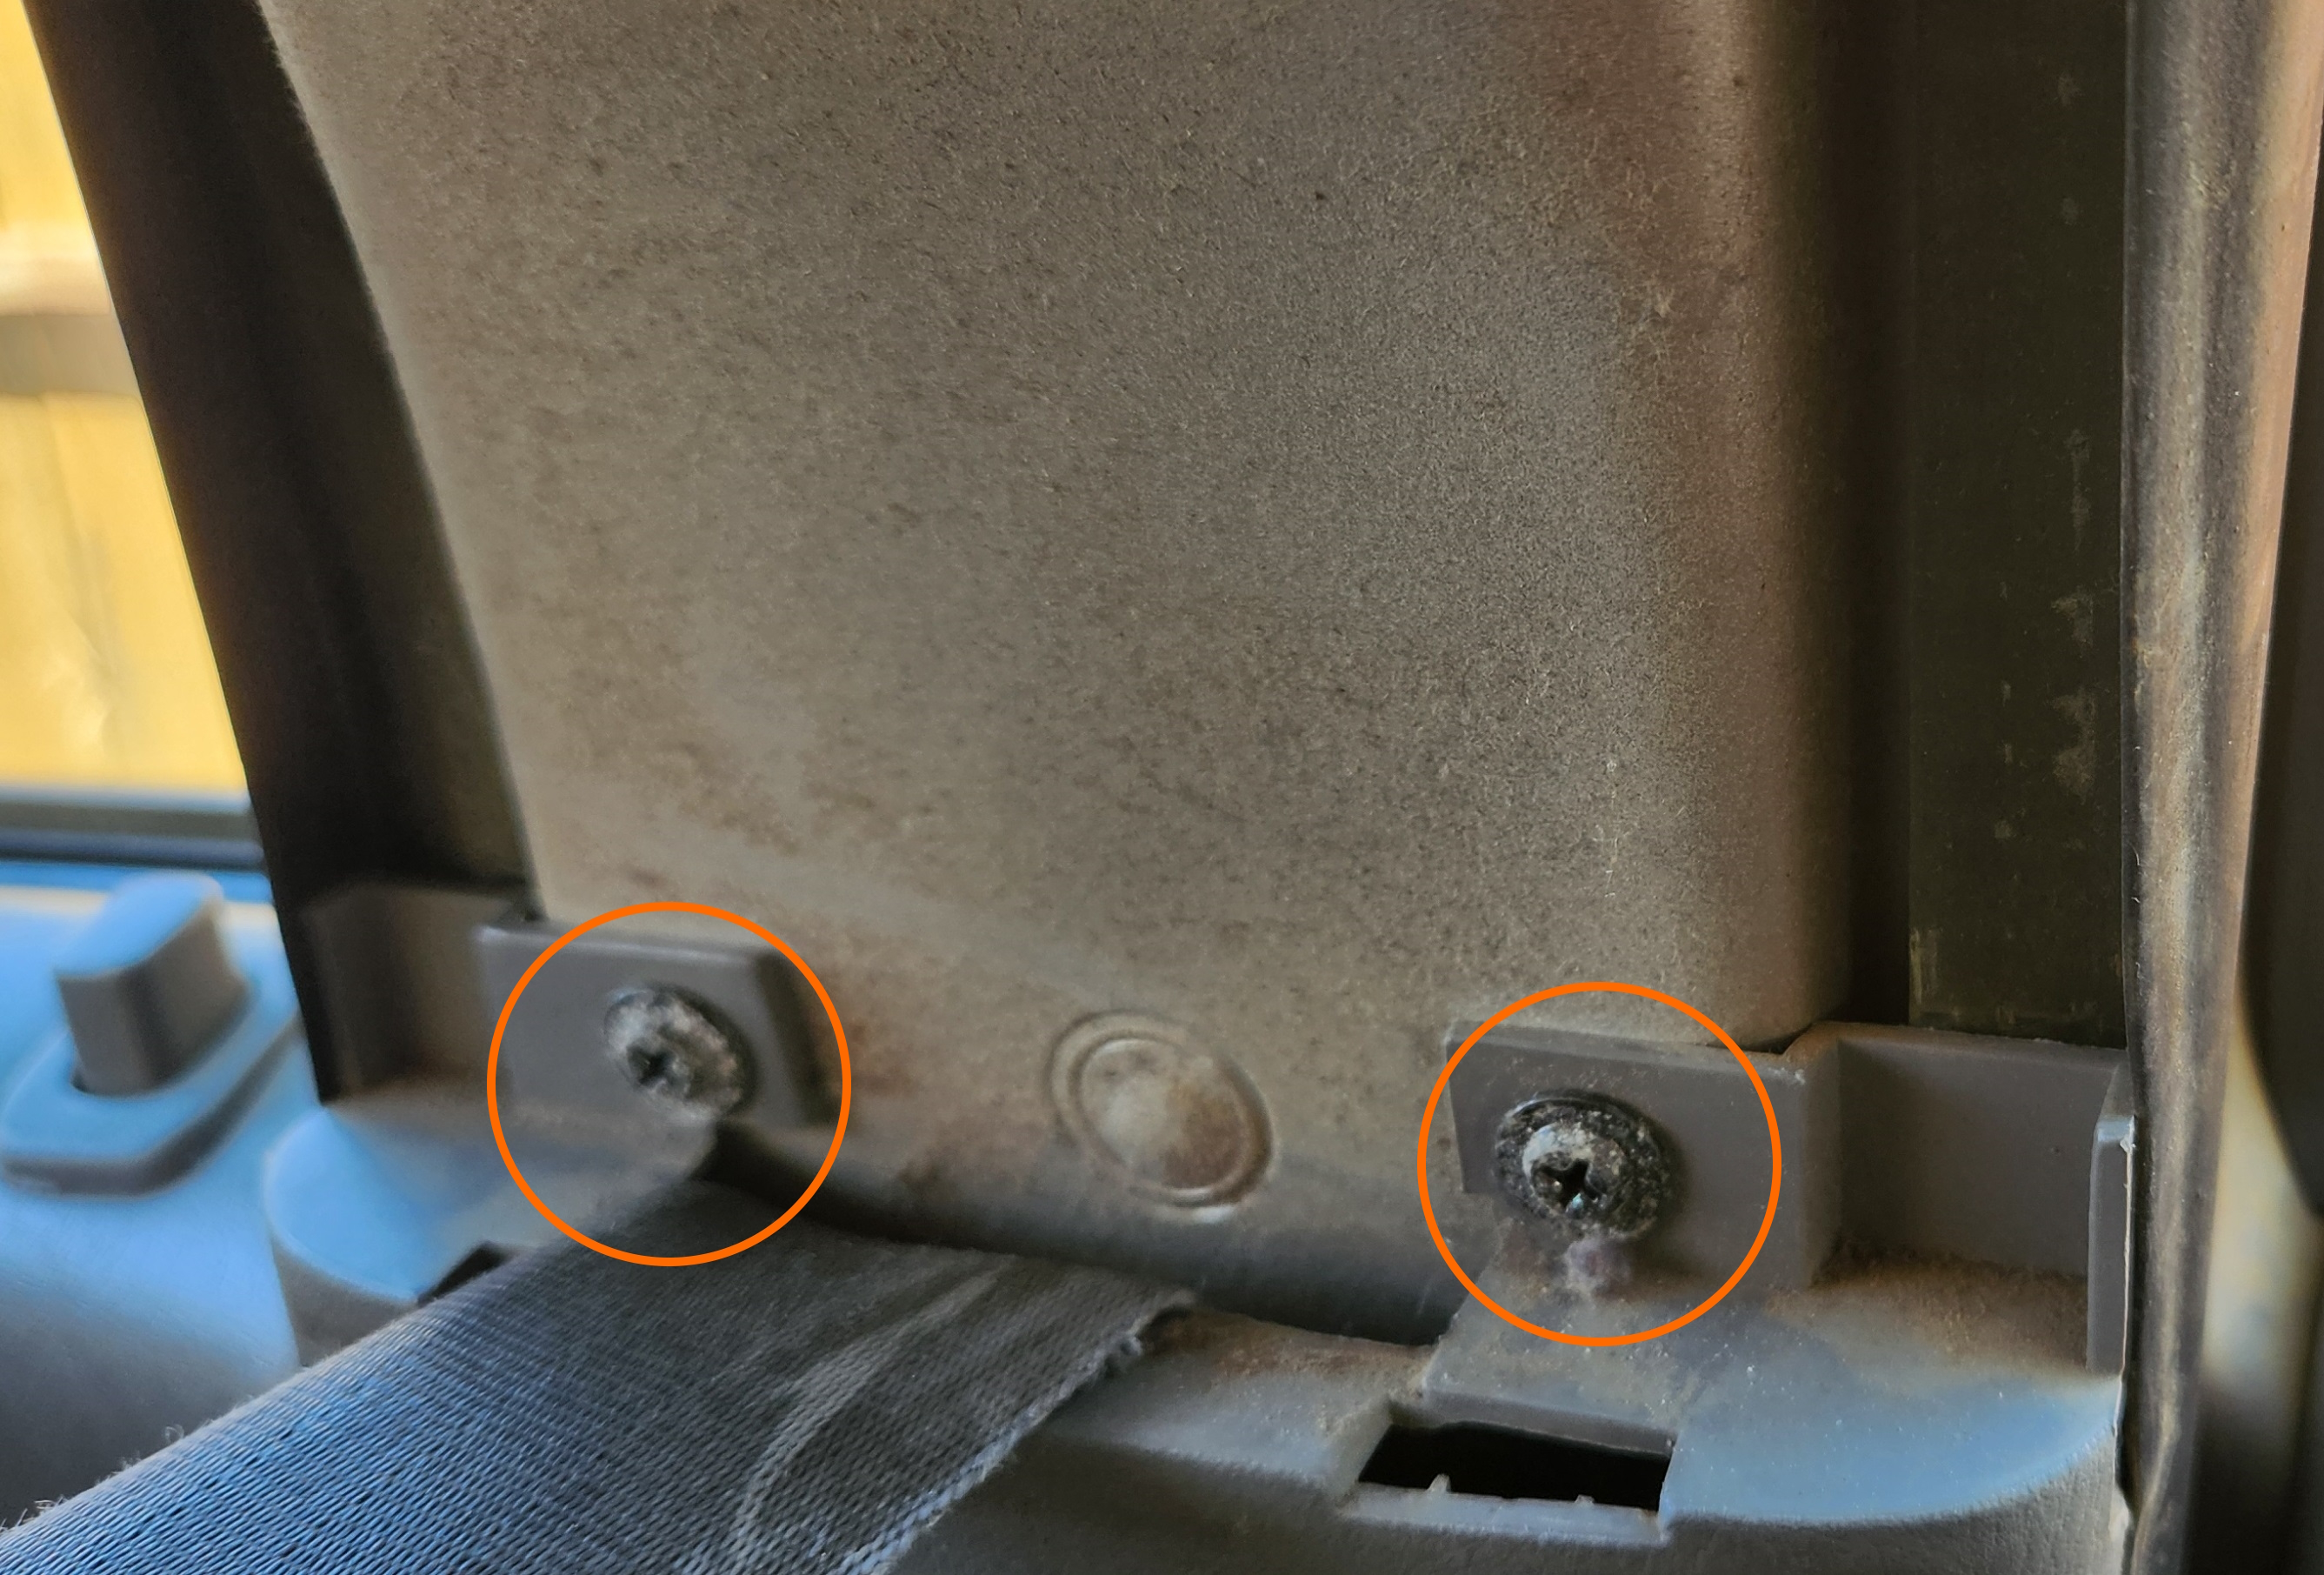
Locations of the 2 phillips head screws to remove from the lower B-Pillar trim pieces
-
Using the T50 socket, remove the bolt holding the retraction mechanism to the chassis.
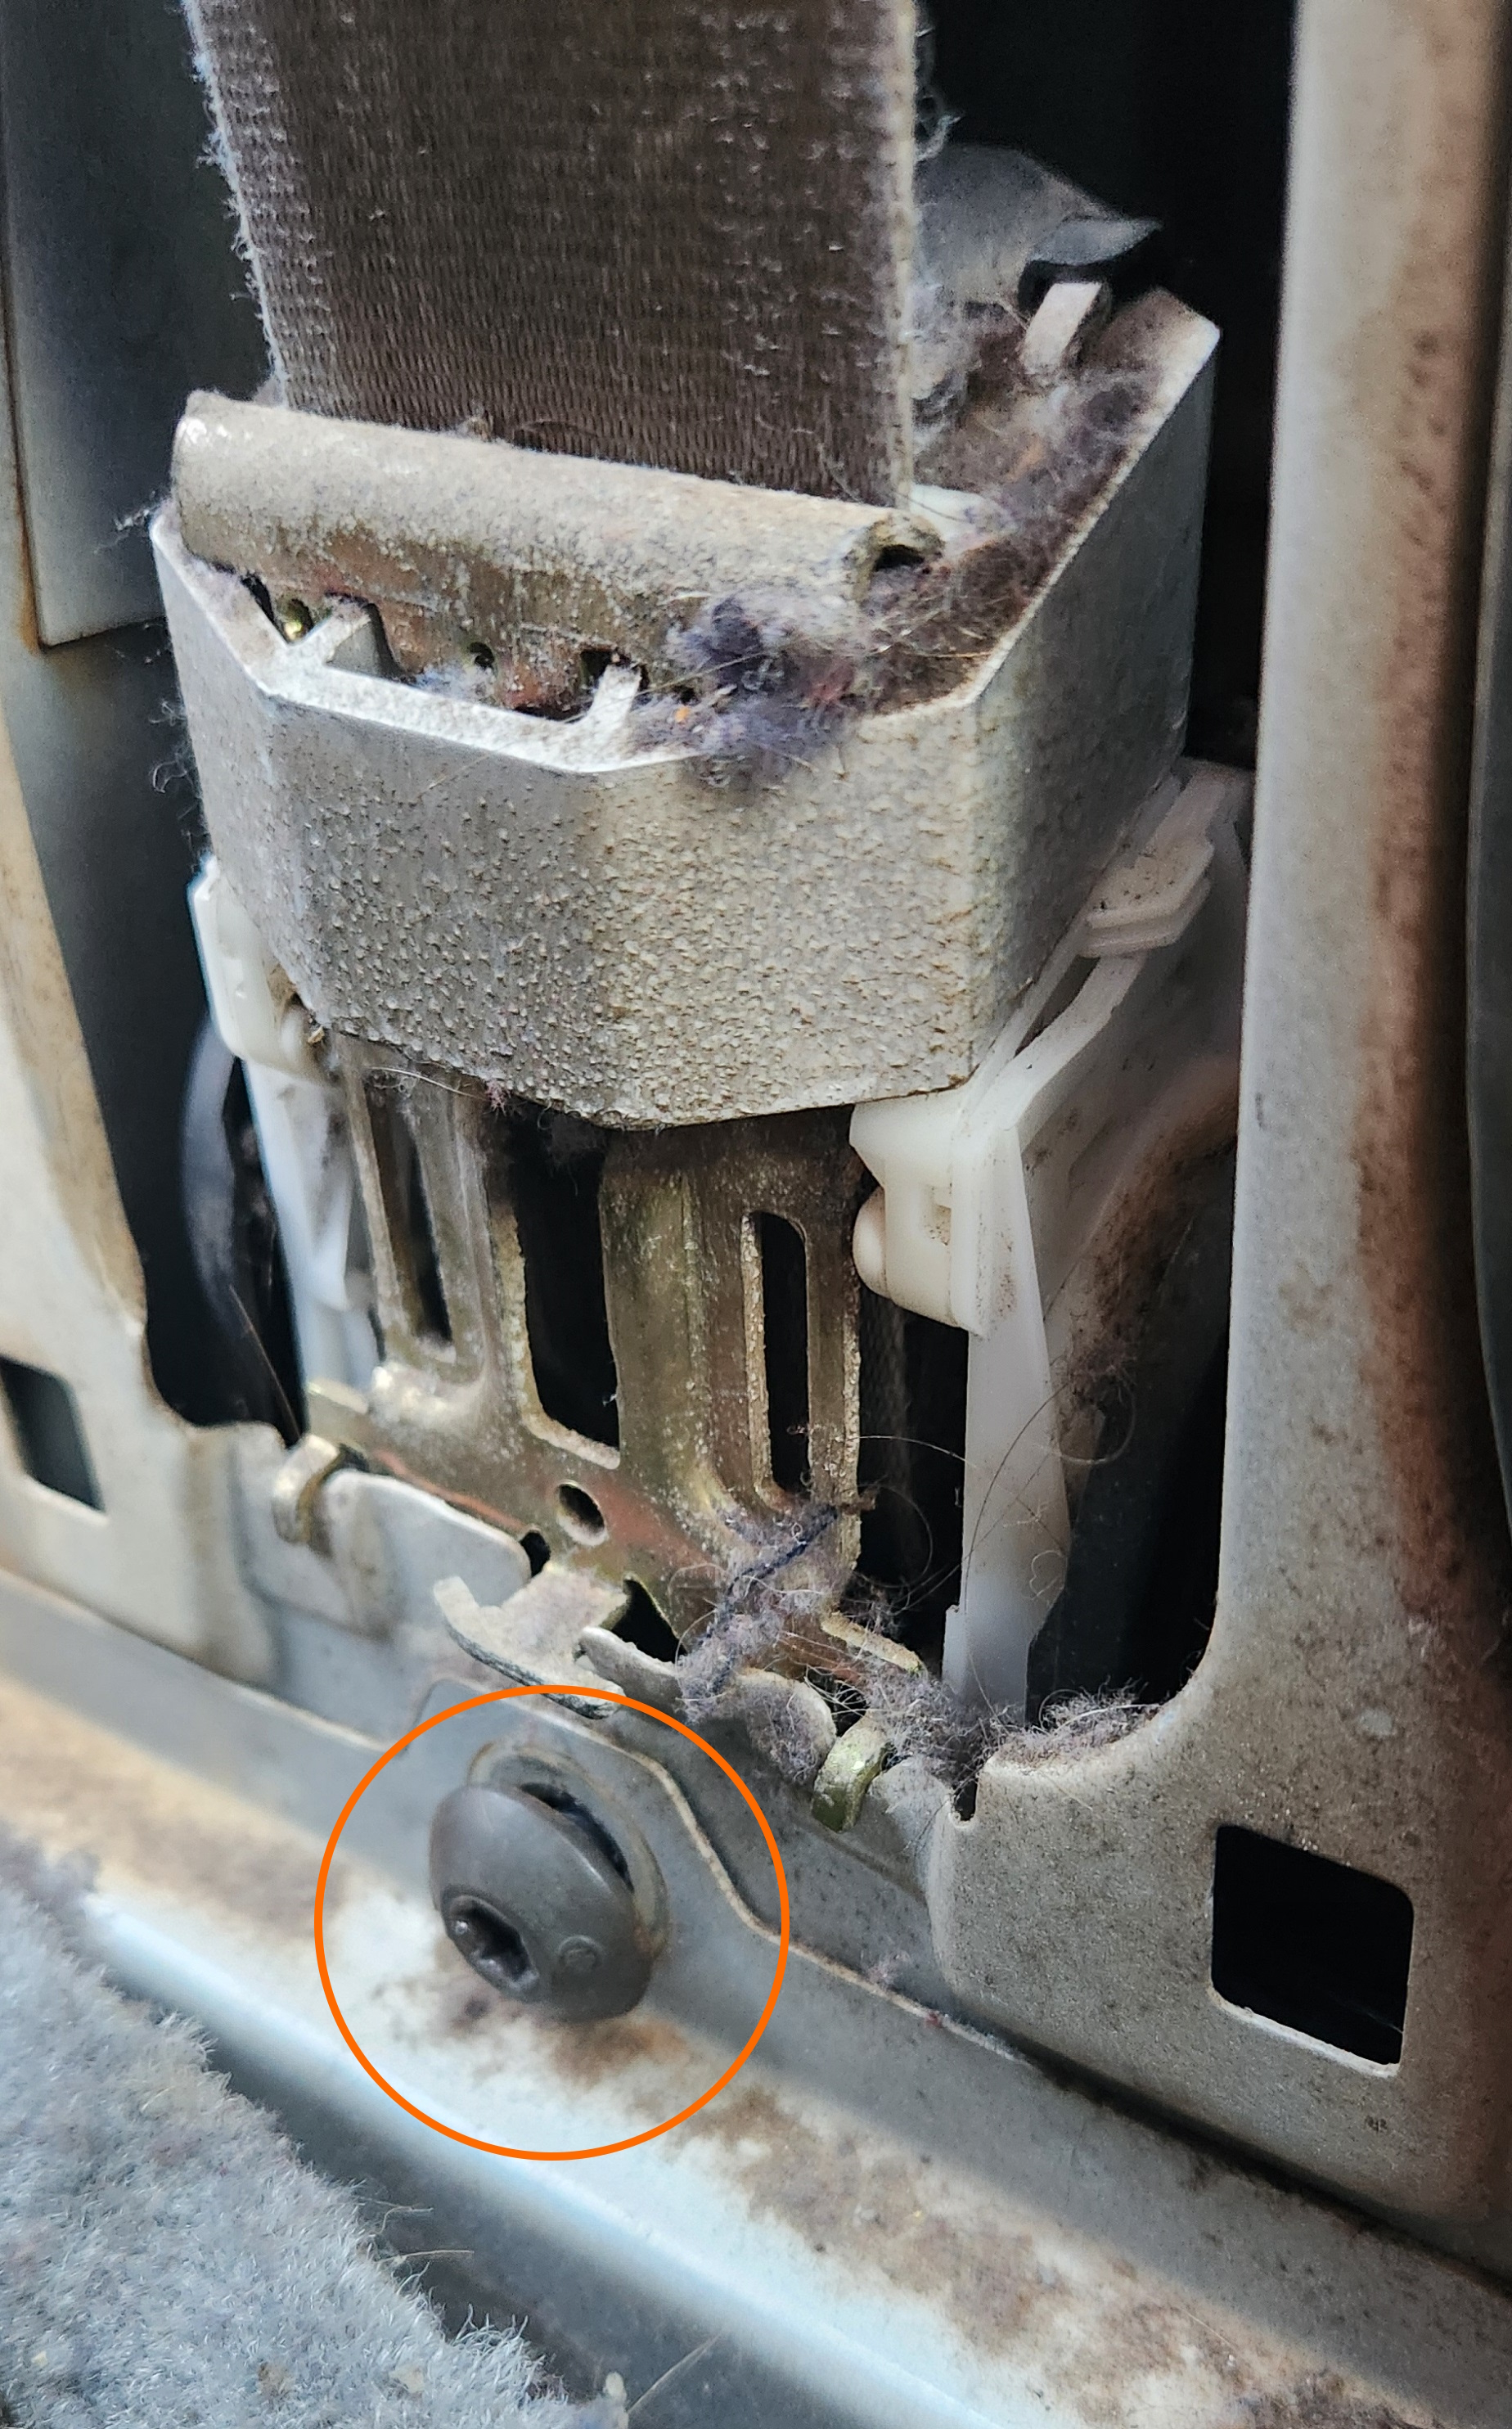
Picture of the T50 bolt to remove for the retraction mechanism end of the seatbelt
-
Using the T50 socket, remove the bolt holding the top anchor for the seatbelt in place.

Picture of the final bolt to remove for the upper anchor of the seatbelt. Note that if you have a height adjustable seatbelt mechanism, there will be additional plastic around this, however nothing should need to be removed other than the bolt.
- Remove assembly as a complete unit with seatbelt, anchor, and retraction mechanism
-
To replace, simply follow all steps in reverse, making sure to tighten all bolts moderately
Use red thread locker on the T50 bolts if available
- Done
Additional Notes
The following are notes for the fitting of non-standard ‘universal style’ seatbelt assemblies:
This section is lengthy for a reason, if you are doing this, read everything carefully
- If replacing , you may want to modify the upper B-Pillar trim plastic to fit the upper pulley in behind. As the fraying of the original seatbelt is usually caused by this, an alternative to finding a good condition original plastic piece is simply using a rotary tool to simply cut a larger hole into the plastic, allowing for free movement of the new pulley. Alternatively you can simply remove the trim piece altogether, however this is not recommended as part of the B-Pillar upper trim piece contributes to the holding up of the headliner.
- Multiple bolts will likely need replacing due to fouling on the new pulleys before being torqued in properly. While the upper pulley bolt can remain as-is, the 2 lower bolts will likely need replacing. The bolt for the anchor plate is confirmed to be a 7/16” UNF Fine thread with approximately 2” length, however the anchor bolt can be easily replaced with a 1-1/2” length bolt as the remainder in the original bolt is a widened sleeve for the original anchor plate itself. This also allows for a tighter fit to the body floor
- Due to the nut on the original retraction mechanism being welded to the assembly, a nut retainer bracket is required. Recommended size for universal seatbelt kits contain 7/16” UNF threaded nut, however these retainers can be hard to come by, with the only known seller at time of writing being Seat Safe. The original bolt likely will not work without widening the hole in the anchor plate, which, for obvious safety concerns, is not recommended.
- Any bolts replaced can have a standard hex head instead of Torx if desired, all bolts have sufficient clearance
- Any bolts replaced should be high tensile, Grade 5 or 8 bolts recommended
Common issues
Seatbelt lockup
When removing the factory seatbelt from it’s location inside the car, you may find that the belt is able to retract but not able to come out. This is easily remedied using the following steps:
- Sit the retraction mechanism up in the same direction to how it was when installed in the car. A small table-mounted vice is perfect if available
- With the seatbelt in hand, drop the belt slightly in (less than 10cm), and then gently pull out
- If this does not work, grab the mechanism and give it a couple of taps a table or solid surface, still while in the same orientation as before and repeat previous steps.
B-Pillar trim - “Plastic Welding”
A common issue with older AU Falcons is the wearing of the seatbelt hole in the B-Pillar plastic trim. This appears to happen due to the plastic being prone to wear from the seatbelt rubbing, and if left unchecked can cause premature fraying on the seatbelt, which is a safety concern and Roadworthy requirement (where applicable). Recommendation is to replace the trim with a similar part, noting that earlier AU Falcon models did not come with an adjustable height seatbelt top anchor, however assuming that is uneconomical or not viable due to lack of parts available, please see below for a “poor-mans plastic welding” fix that can be used
Requirements
to complete this job you will need the following:
- Large soldering iron with screw-in tip
- Tape (Packing tape or cloth tape recommended)
- Any bolt or screw that can fit inside the shaft of the soldering iron (optional, provides a disposable tip as plastic is hard to remove from a soldering tip)
- Bolt-cutters
- Cable ties (light coloured preferred)
- N95 mask (for plastic fumes)
Steps
- (optional) using the bolt cutters, cut the head from the bolt or screw. Try to have as clean of a cut as possible as this may improve the surface of the finished repair
- (optional, if completed step 1) place the bolt or screw in the soldering iron with the cut edge facing outwards
- Use some tape to cover the outside of the plastic trim where the plastic is cut away. Flip over the assembly and place short cuts of the cable ties across the inside of the cut
- Wear your N95 mask and heat the soldering iron to high heat. apply the soldering iron gently to the cable ties, allowing them to melt and flow into the cut. Note this may take some coaxing to get right but it is possible
- Cut and remove any unmelted or unneeded cable tie material, and use a high grit sandpaper to further smooth the edge of the cut where it used to meet the seatbelt hole
- (optional) paint over repaired area or use the opportunity to respray the entire trim piece to your favorite colour.
- Done