AU Ford Falcon - SPUD Project


12V Accessory Power Source (Cigarette Lighter) information on the 12V accessory plug (cigarette lighter socket). Applies to EA/EB/ED/EF/EL/AU/BA/BF Falcons and SX/SY Territory models Antilock Braking System (ABS) Antilock Braking System (ABS) information Air Conditioner Controls - Series 1 air Conditioner controls repair information (Series 1 only) Accessory plug Information on the Mobile Office pack accessory plug. Also relevant to the BA/BF/FG Falcons and SX/SY/SZ Territorys Alternator alternator information Body Control Module (BCM) Body Control Model (BCM) information Digital Clock Information on the basic clock available on all low models Brake Switch brake switch replacement Reading Vehicle Identification Plate (Build Plate) Codes - How to read Vehicle Identification Plate A.K.A. build plate codes Crankshaft Angle Sensor basic information on the Crankshaft Angle Sensor, or CAS. Cabin Fuse Panel in-depth information on the continuity and functionality of the interior cabin fuse box PCM Catch Codes Centre Console Buttons accessory buttons (e.g. TCS, ABS, ANT.) information and pinouts Manufacturer Specific Instructions - CodeEzy Keyfob cloning instructions using a CodeEzy branded universal keyfob (Smartlock only) Common Faults common faults Credits Credits DTCs DTC (A.K.A Diagnostic Trouble Codes), and other relevant ECU/PCM Information Door Lock Actuators repair and replacement information for the door lock actuators. Also relevant for BA/BF Falcons and SX/SY Territorys Interior Driver Buttons information on driver-side console buttons (Lock/Boot/Fuel) Engine Number engine number information and location Exterior Door Handles Information on the replacement of the exterior door handles. Also relevant to the BA/BF Falcons and SX/SY Territorys Factory Specifications Factory Specifications fuel filter replacement Fuel Injectors fuel injector diagnosis and replacement Fuel Pressure Regulator Fuel Pressure Regulator replacement steps. applicable to BA/BF/FG/FGX Falcons and SX/SY/SZ Territory models (I6 only) Fuses & Relays fuse information and minimum viable fuses, including diagrams and parts tables Headlight Switches headlight switch controls information and pinouts Head Unit Head Unit information Idle Speed Controller (ISC) Idle Speed Controller Information Ignition Coil Pack ignition coil pack information, including replacement and testing information Instrument Cluster instrument cluster information and special functions Interior Mirror information and removal and replacement information for the interior mirror. Also relevant to the BA/BF/FG Falcons and SX/SY/SZ Territorys Manufacturer Specific Instructions - KEYDIY keyfob cloning instructions using a KEYDIY branded keyfob and programmer Central Locking Keyfobs central locking and Central Locking keyfob information Component lifespans - Educated guess lifespans for common maintenance components. Likely partially useful for various models of vehicle Miscellaneous Notes - Uncategorized notes not requiring a dedicated page PCM PCM (ECU equivalent) location and general information PCV PCV information and replacement instructions Parts Sharing - (partial) list of shared parts from Ford Falcons XA/XB/XC/XD/XE/XF/XG/XH/EA/EB/EF/EL/AU/BA/BF/FG/FGX, and Ford Territory SX/SY/SZ Premium Audio System Premium Audio Information Rear Lights Connector tail light/rear light assembly plug information Relays - General Information types of relays (general information) Manufacturer Specific Instructions - Remocon Keyfob cloning instructions using a Remocon branded keyfob and programmer (Smartlock only) Roof Racks roof rack installation methods and information Seatbelts replacement and repair instructions for seatbelts and B-Pillar Seatbelt trims. Partially useful for the BA/BF Falcons and SX/SY Territory models Series Information Series specifics information Sparkplugs spark plugs information and replacement instructions Speakers Speaker installation and wiring information. Partially applies to BA-BF Falcons and SX-SY Territory models Speedometer Reading Calculator interactive calculator for changing of speedometer reading based on transmission driven gear, diff ratio, and wheel size. Changing Differential Ratios and Tyre Sizes calculations required for changing of speedometer reading based on transmission driven gear, diff ratio, and wheel size. Steering Wheel Controls steering wheel Cruise Control and Media Control assembly information, pinout, and 3D printable model Thermo Fan Thermo fan removal instructions Thermostat thermostat replacement instructions PCM Relearn PCM Relearn procedure Reading the Tickford Vehicle Engineering (TVE) Plates - How to read the Tickford Vehicle Engineering (TVE) Plates Trailer Auxiliary plug towbar trailer connector information, including instructions on how to wire a custom trailer plug (if required). Partially applicable to BA-BF Falcons and SX-SZ Territorys Tyre Size Calculator Generic Tyre Size Calculator how to read and decode the VIN number and engine number Ford Falcon AU VIN Decoder Ford Falcon AU Interactive VIN Decoder Verification Letters how to get an official Ford Verification Letter. Will work with other similar models Wheels & Tyres information on the tyre sizes and brake dust covers. also includes general information on calculating tyre size from a tyre size Sedan audio upgrade - 6x9” Speakers

Thermostat

Thermostat

Diagnosis

Diagnosis for the Thermostat is usually quite simple, as it will usually only fail in one of 2 ways:

Replacement

Replacing the thermostat in an AU Falcon is a very simple job to do. Follow the steps below to replace the thermostat:

  1. (if not pre-assembled) assemble your thermostat and rubber seal. Note that the rubber seal should have a groove in it that the thermostat sits inside of.

    UNDER NO CIRCUMSTANCES is it advisable to reuse old rubber seals

    Rubber seal for thermostat

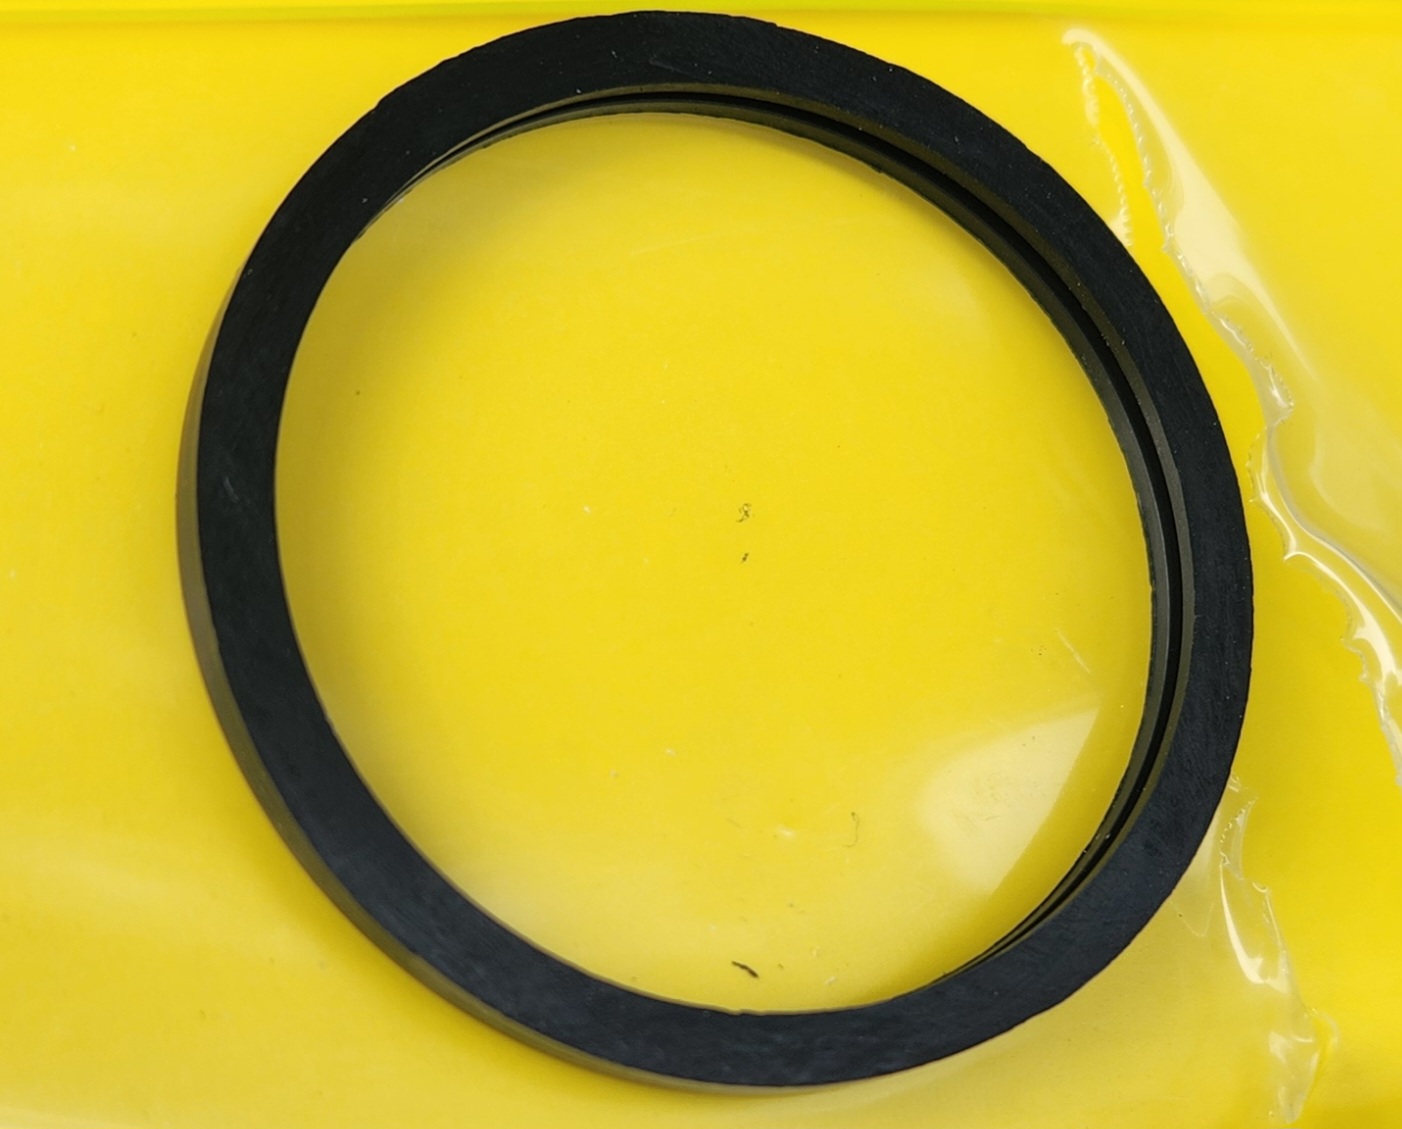
    Photo of rubber seal that fits on thermostat. Note the seam around the middle of the seal that the thermostat sits in

    Assembled thermostat

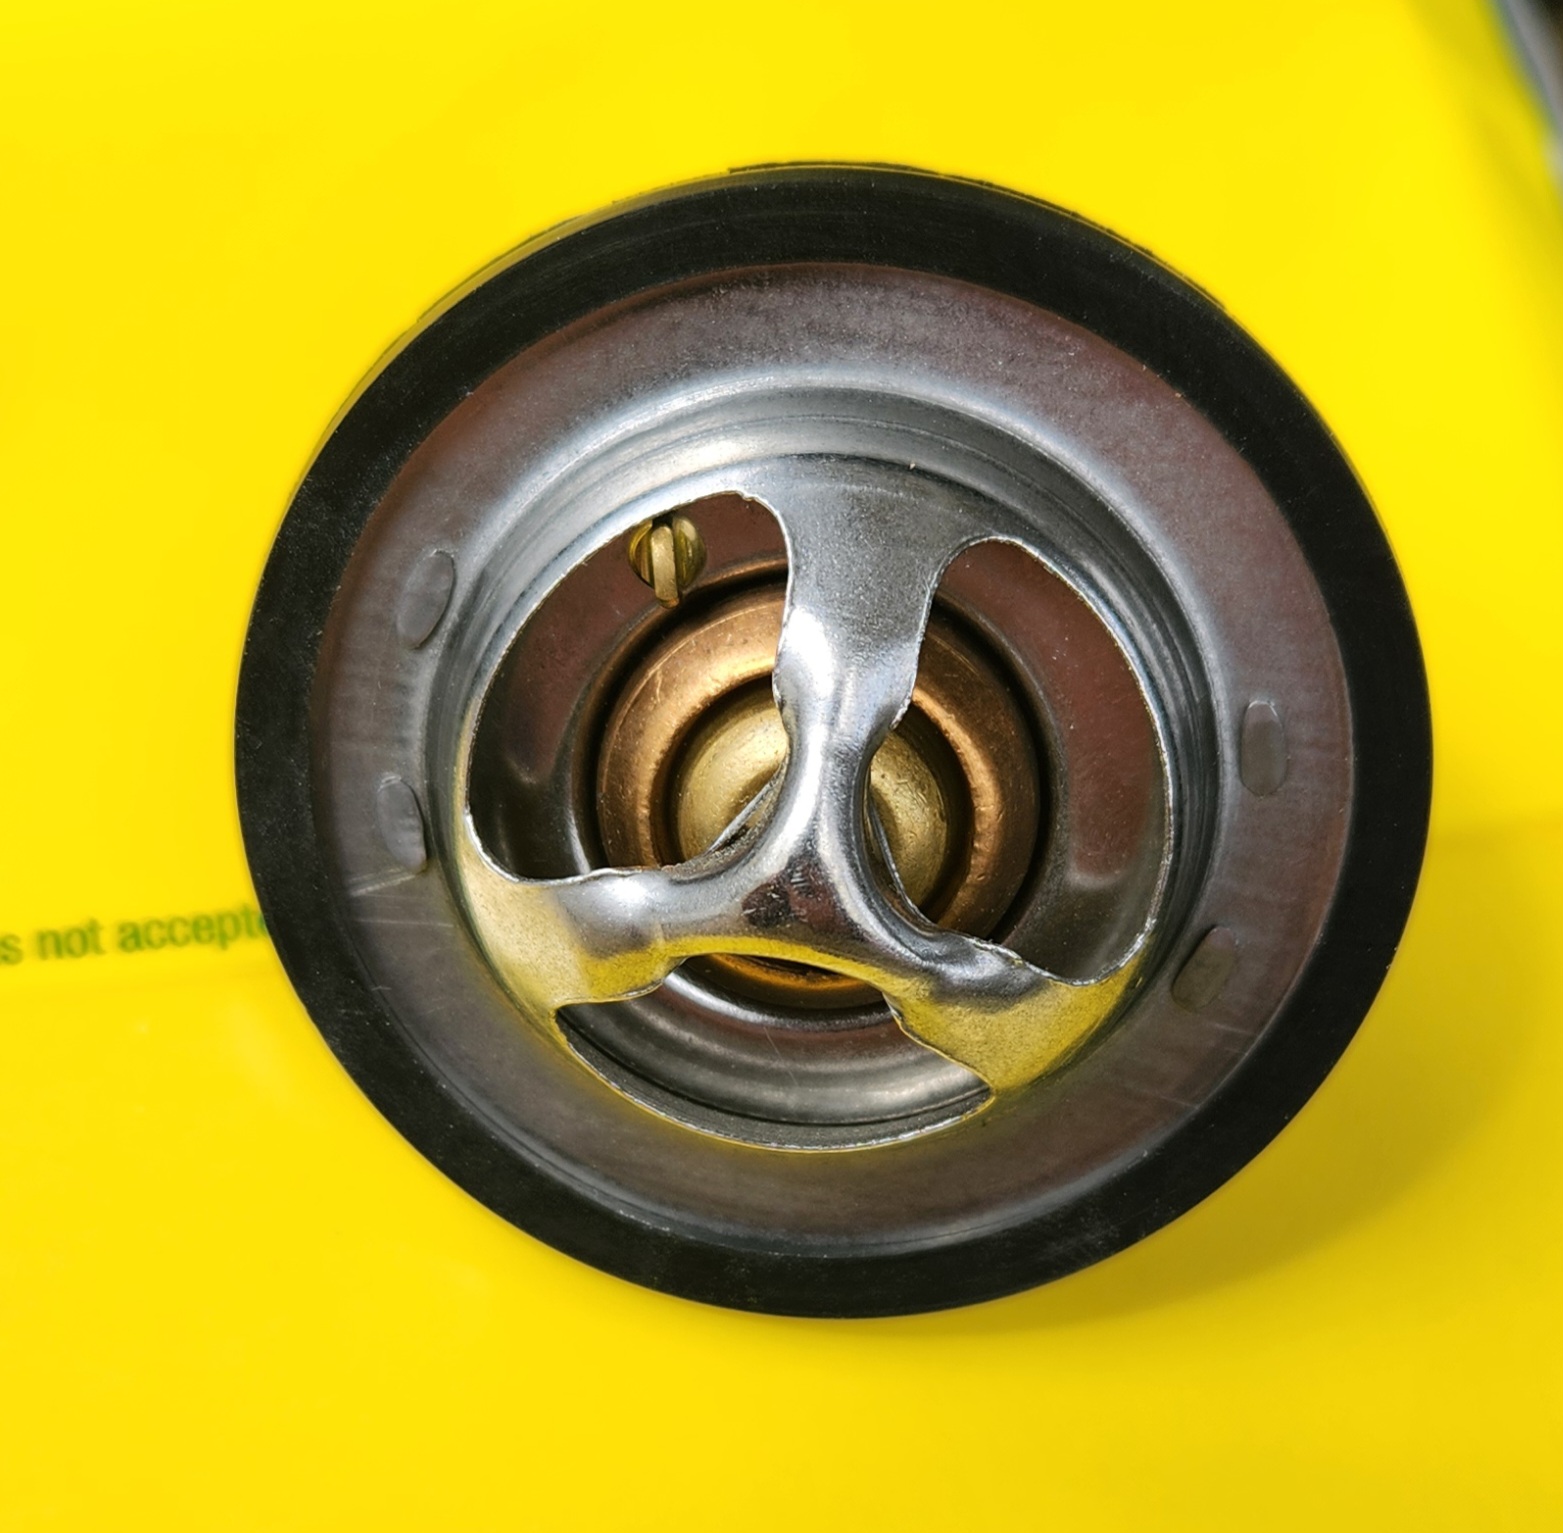
    Photo of assembled thermostat. This particular part is a high-flow thermostat manufactured by Tridon

  2. (optional) drain radiator and overflow tank to at below where the top radiator pipe meets the radiator

    This is not required if you are willing to lose approx 500ml of coolant to either a towel or the ground beneath the car. It will hit the AC Compressor on the way down also, so if you choose to remove with coolant you should be wary of the electrical plug on the passenger side of the compressor housing. It should be waterproof but it is also old by now

  3. (if your vehicle has a belt cover) remove your belt cover by removing the lid of the Power Steering pump reservoir and removing the single 10mm bolt holding the shroud to the top of the thermostat housing

    Fan shroud nut location

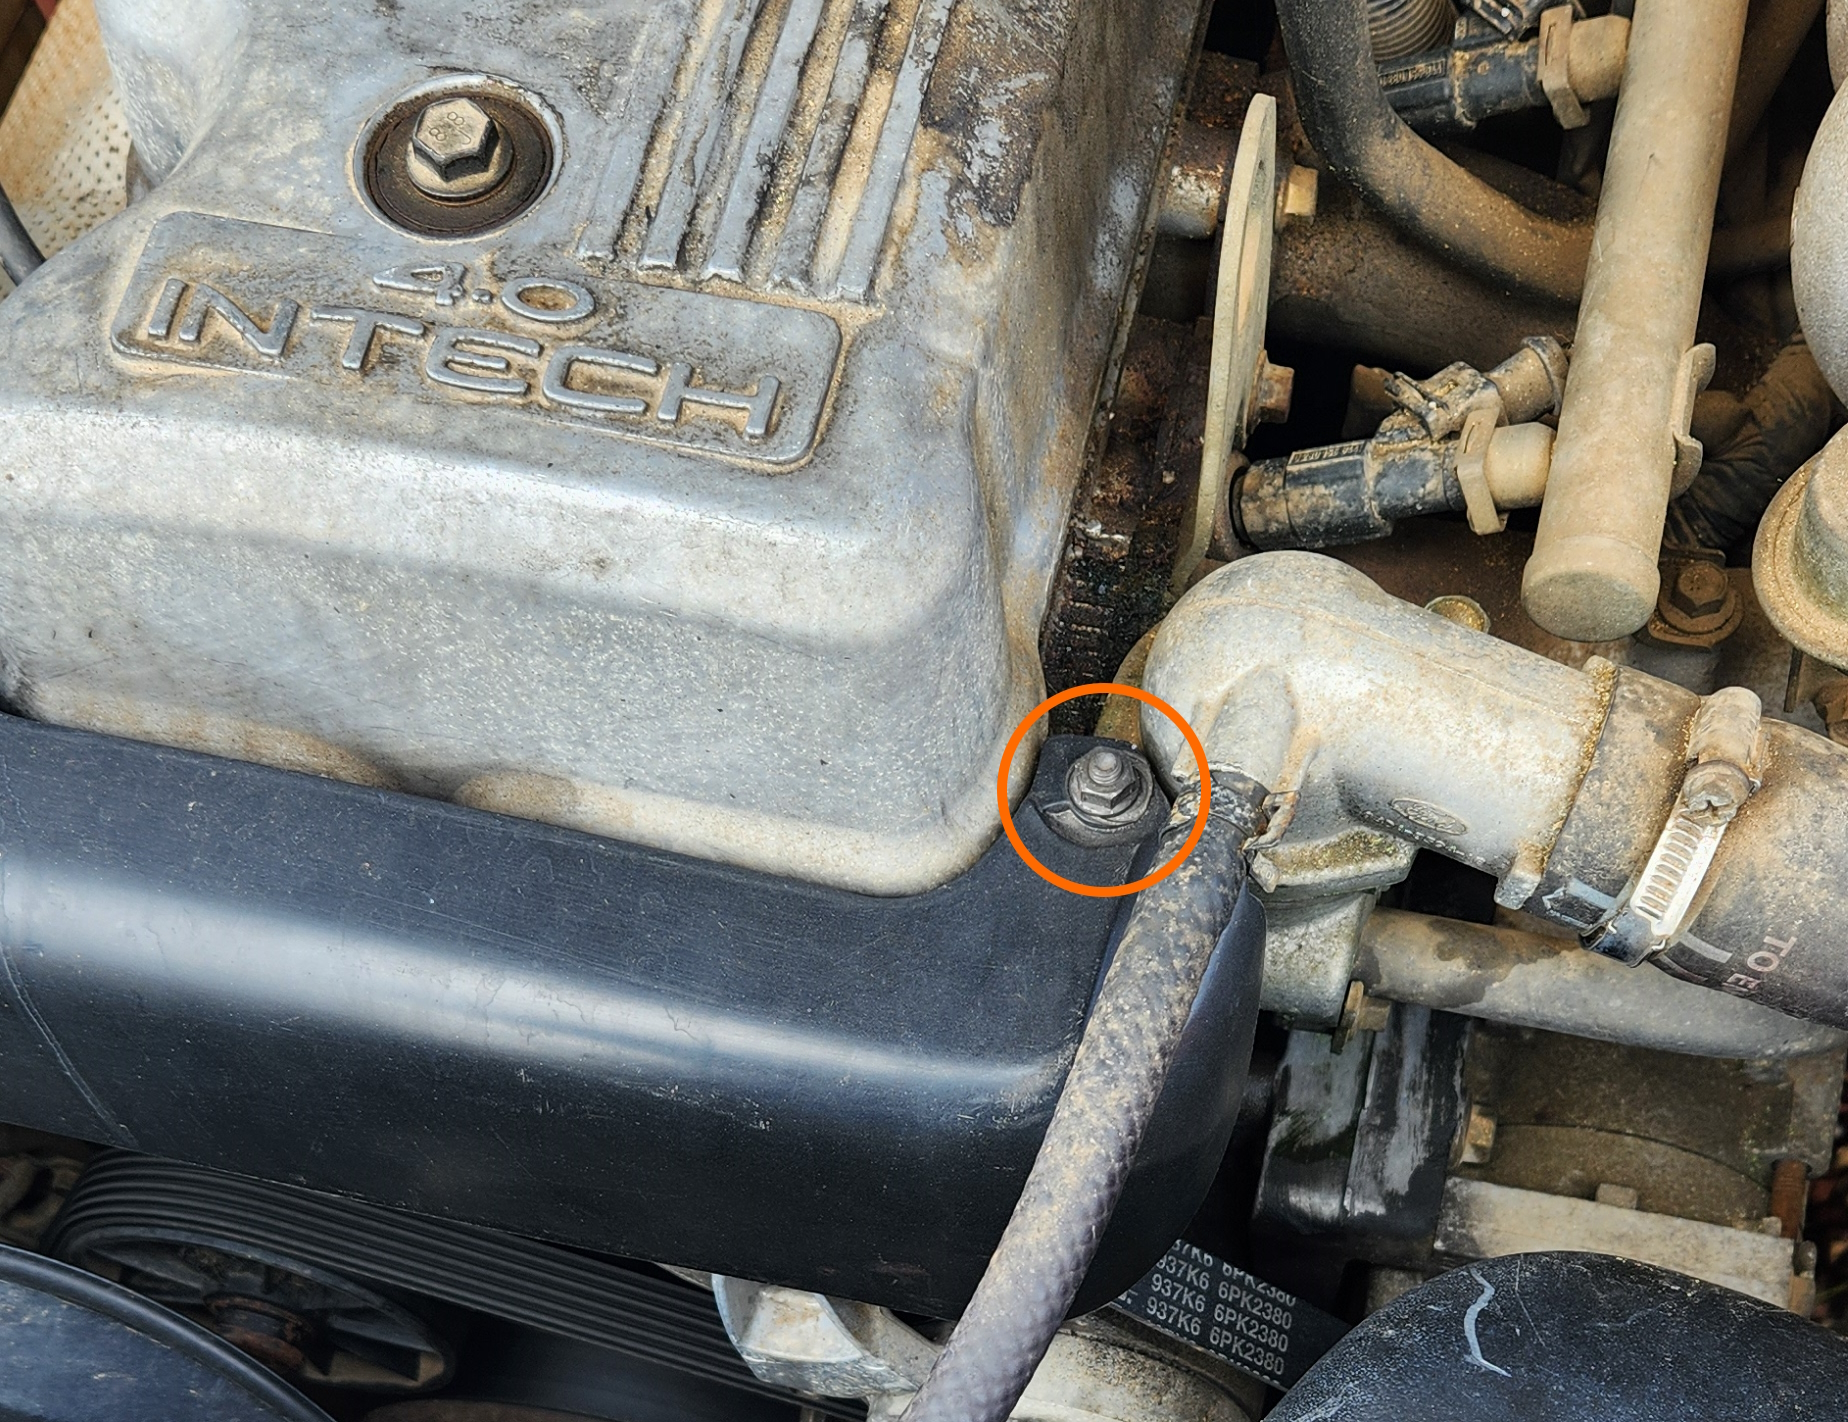
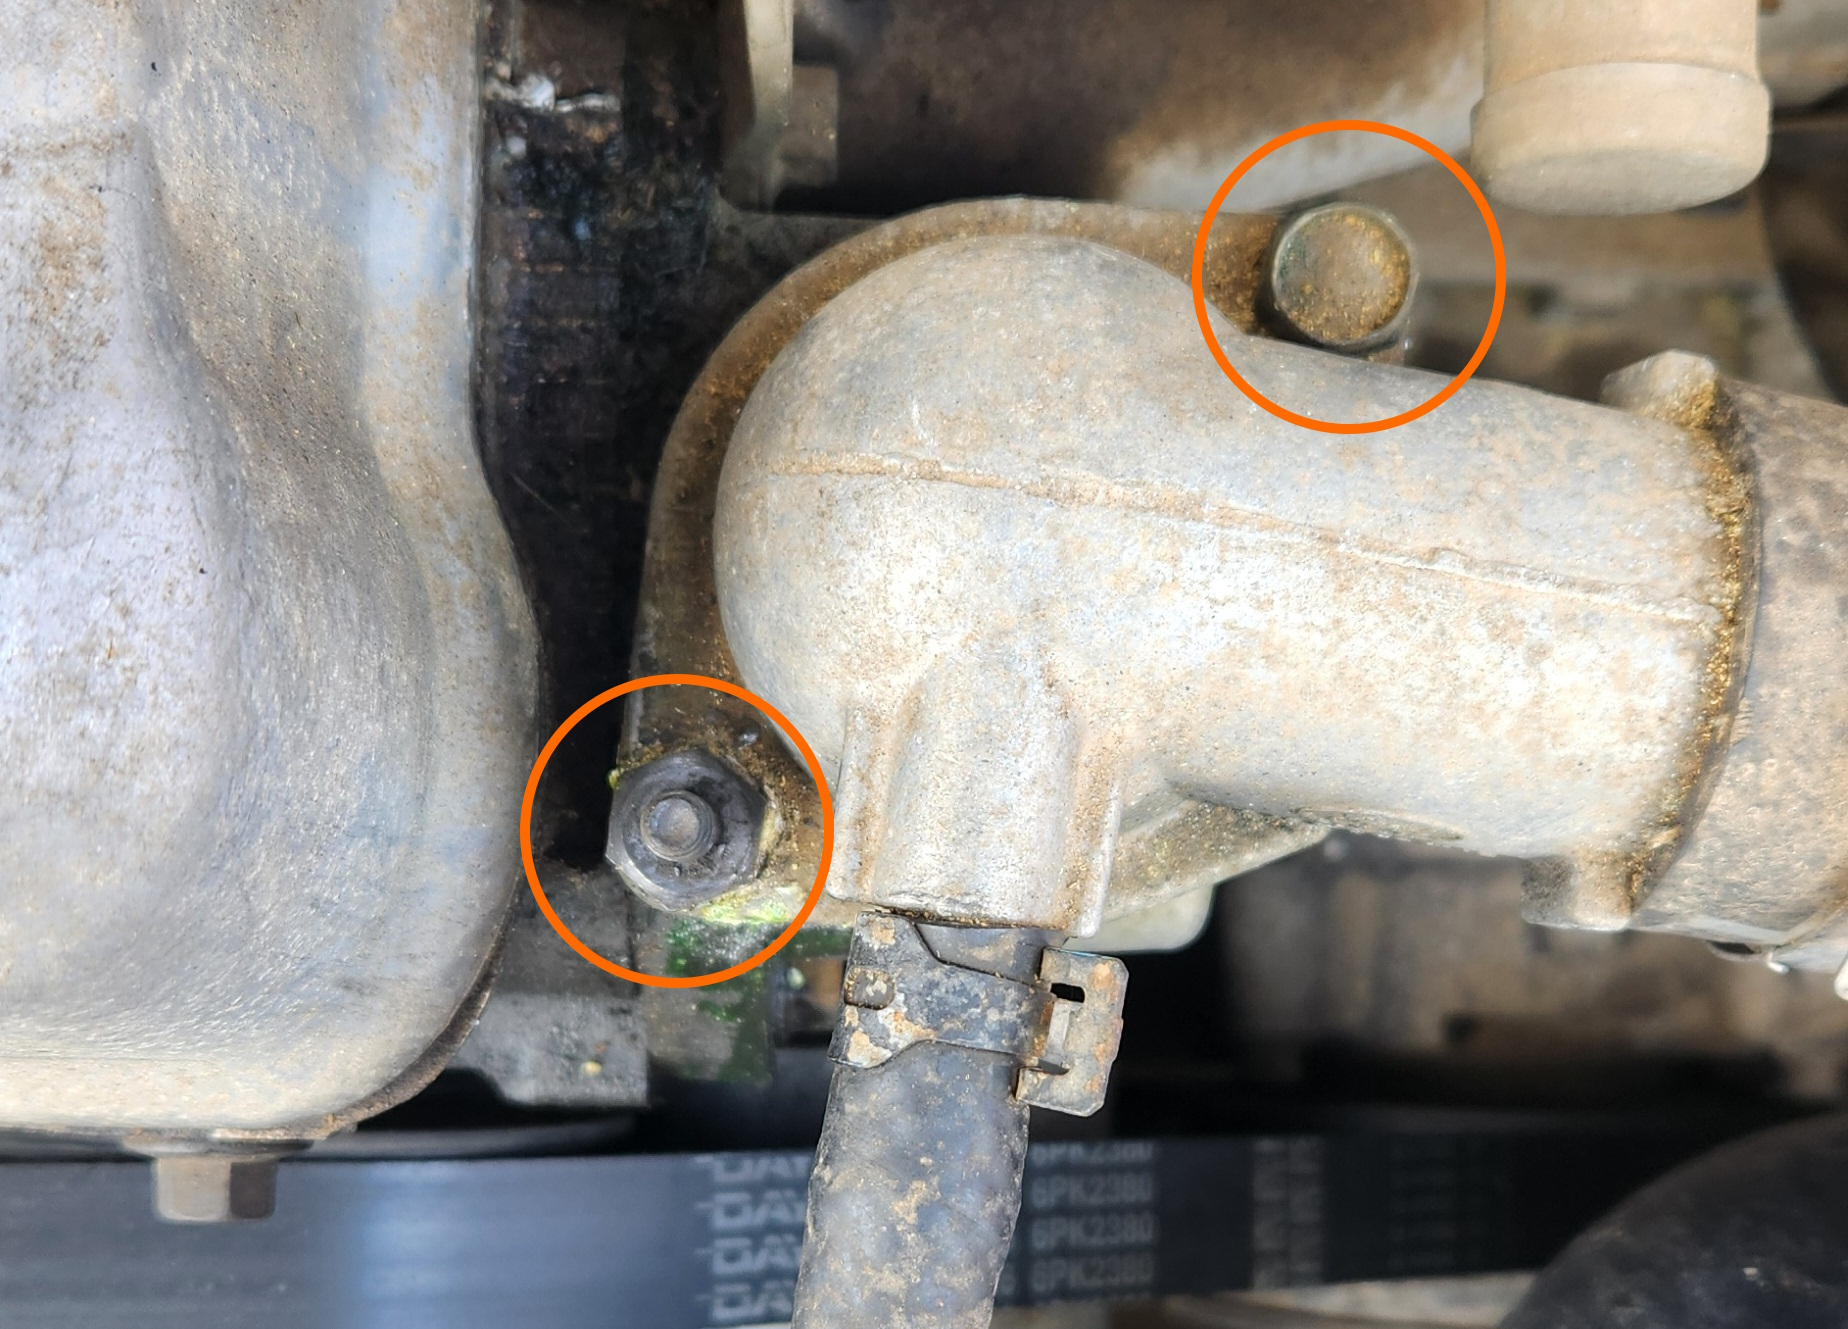
  4. Remove the 2 13mm bolts holding in the thermostat housing to the side of the engine and gently lift up the thermostat housing.

    If you did not drain the radiator, this is where the majority of the coolant will come out

    Thermostat housing bolt locations

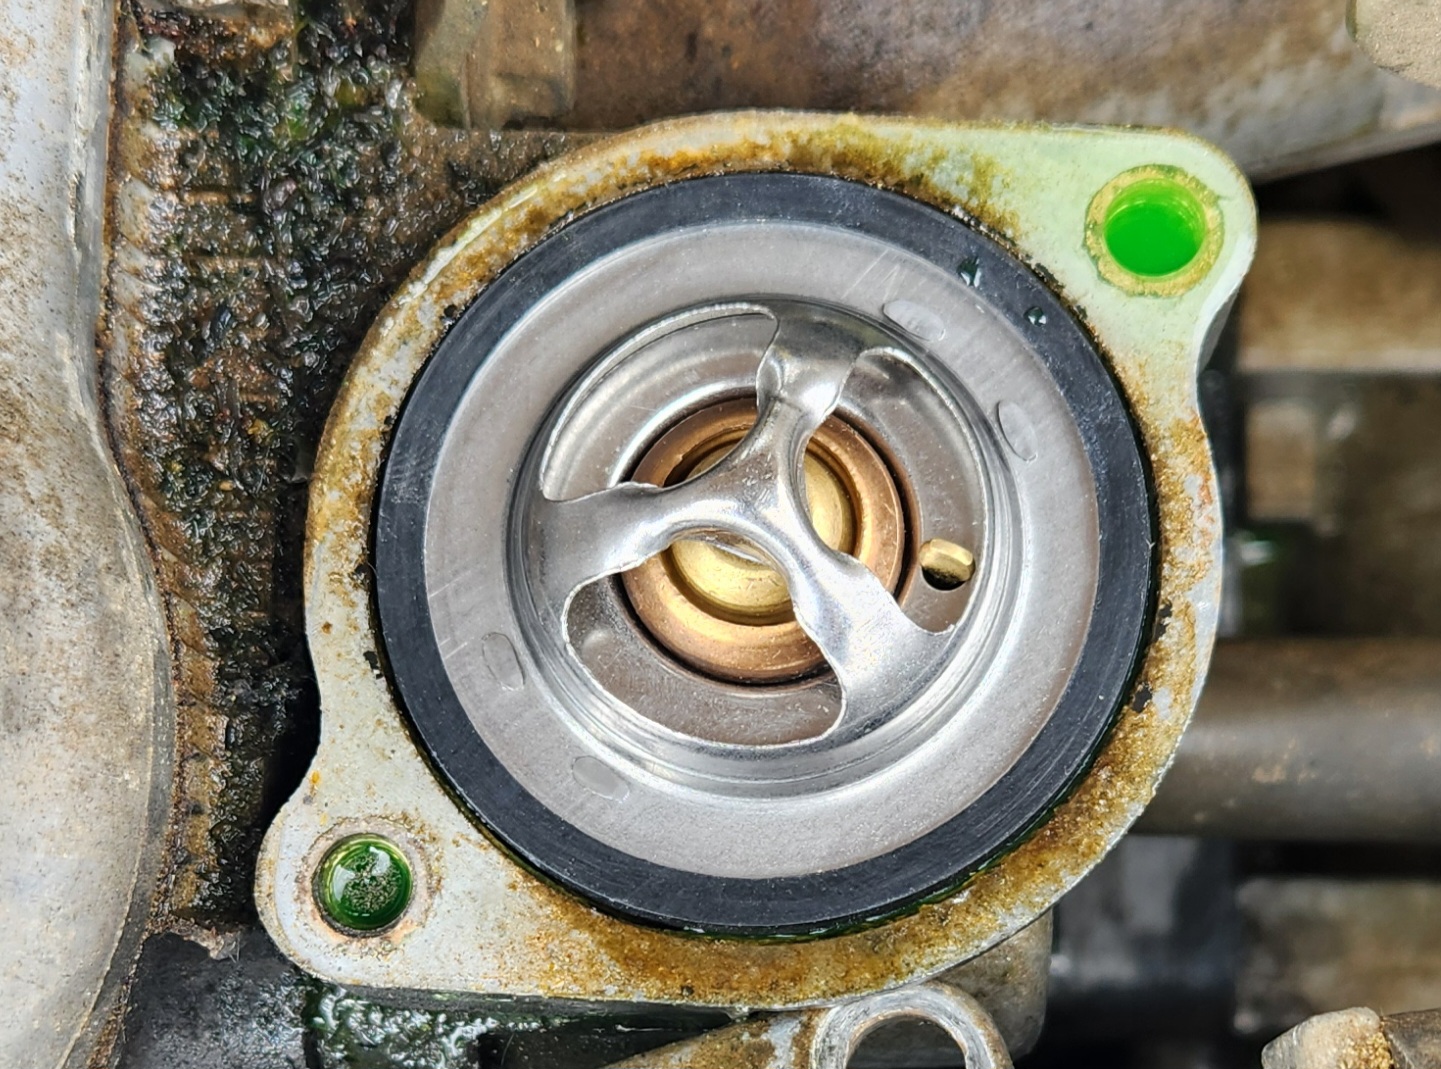
  5. Remove the old thermostat by pulling up while gently prying at the rubber seal from the side

    You may need to use a trim removal tool to remove an older seal, however avoid using a screwdriver as it may damage the mating surfaces of the thermostat housing

    Thermostat housing pre-removal Thermostat housing post-removal

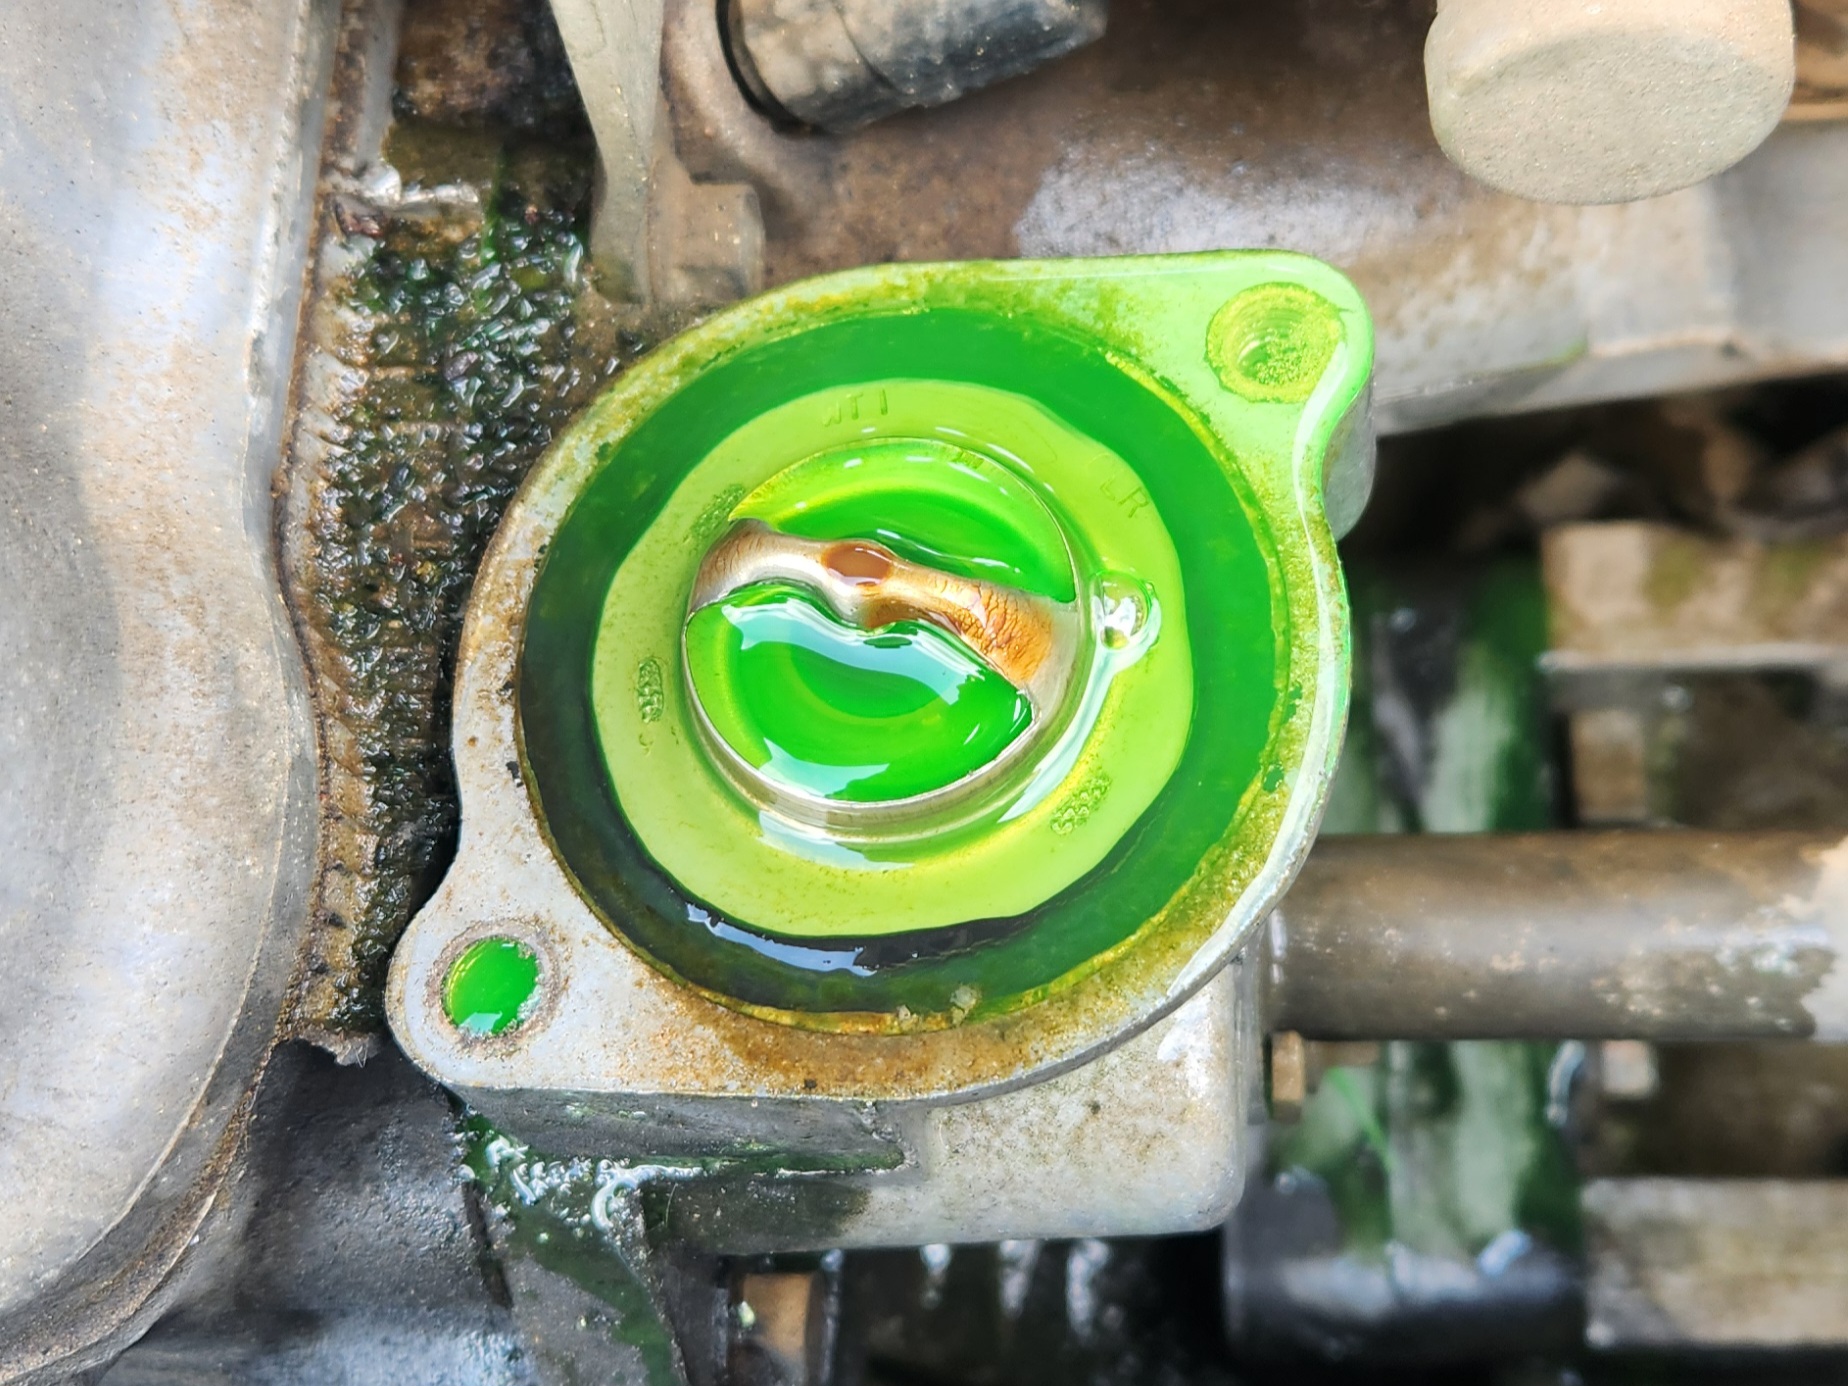
    Photos taken before and after removal of original thermostat respectively. Note the radiator was not drained prior

  6. (optional) if required, clean the mating surfaces of both the thermostat housing and the engine side connector using a cloth

    The thermostat housing is the most likely location to need cleaning, due to it being where the rubber seal presses onto the bracket

  7. Install the new assembled thermostat into the housing

    Thermostat housing post-installation

  8. Reinstall the 2 13mm bolts that hold the thermostat housing down

    Ensure you have installed the bolts in the correct position if you have a belt cover, as only one has the thread on the top to hold the cover on

  9. Refill coolant back to the “MAX” line on the overflow tank

    If you have drained the coolant, refilling the radiator may require running the car for a time after this process is complete for the coolant to Cycle through or “burp”, allowing for another few litres of coolant to be added. Make sure this is monitored over the course of the next 100 or so kilometers if this is the case

  10. (if your vehicle has a belt cover) reinstall the belt cover and screw down the 10mm nut once in place
  11. Start and run the vehicle for 2-5mins and ensure that there are no leaks coming from the thermostat housing
  12. Done

Page last updated: 05/07/2025

Page printed from The AU Falcon SPUD Project, visit https://digi-ron.github.io/AU-Falcon-SPUD-Project/ for more!